Applying Presets
Apply to selected layers
Section titled “Apply to selected layers”- In an open comp, select one or more layers.
- Select a preset and click Apply in the info pane, or double-click its card. With a card selected, Enter applies it too.
The preset is applied to each selected layer, and your selection is left as it was. Locked layers are skipped. The footer says what was applied.
The whole apply is one undo step.
Apply with nothing selected
Section titled “Apply with nothing selected”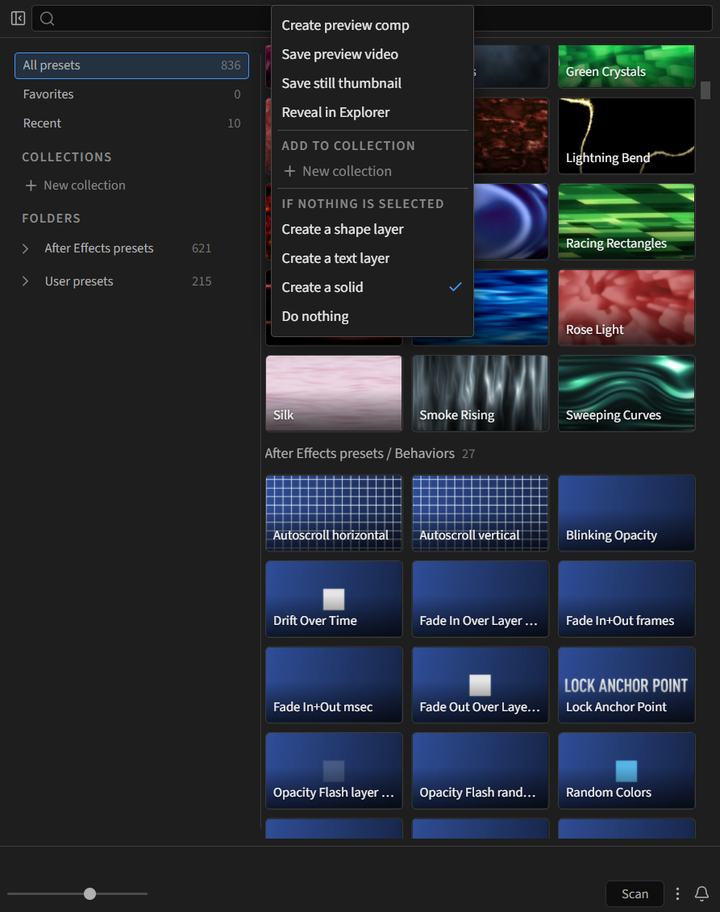
With a comp open and no layers selected, Preset Browser creates a layer for the preset and applies it there, in the same single undo step:
- a text layer for presets in a folder whose name mentions text, carrying the preset’s name so the animation shows
- a shape layer for presets in a folder whose name mentions shape
- a comp-sized white solid for everything else, since effects need pixels
To change what a preset does, open its card’s three-dot menu and pick one under If nothing is selected:
- Create a shape layer
- Create a text layer
- Create a solid
- Do nothing
The choice is remembered per preset. A selection always wins: with layers selected, the preset goes on them.
Find the file on disk
Section titled “Find the file on disk”Reveal in Explorer (Reveal in Finder on macOS) opens the preset’s folder with its file selected. It is in the card’s three-dot menu and in the info pane. A folder’s three-dot menu in the sidebar has the same item for the folder.
Add your own presets
Section titled “Add your own presets”Your own presets live in the User Presets folder that After Effects uses:
- Windows:
Documents\Adobe\After Effects <year>\User Presets - macOS:
Documents/Adobe/After Effects <year>/User Presets
Save a preset there from After Effects, or drop .ffx files into it, then click Scan. To open the folder, use Reveal in Explorer or Reveal in Finder from the User presets menu in the sidebar.